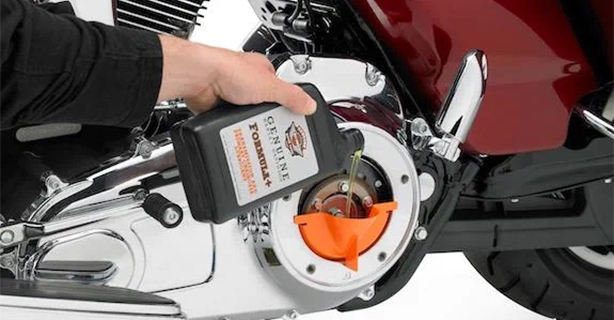
Regular oil changes are one of the simplest yet most important steps to keeping your bike running smoothly and avoiding costly repairs. Changing your motorcycle’s oil might seem daunting at first, but with the right tools and a bit of know-how, it’s a straightforward process you can confidently tackle at home. This guide will walk you through the essential steps, from selecting the right oil to performing a clean and efficient oil change.
There's nothing more frustrating than when your motorcycle breaks down, is there?
And when you find out that it all could have been avoided with a simple oil change, you may even feel slightly silly.
Changing your motorcycle's oil can seem like a daunting task. But with the right tools, knowledge, and patience, you can easily do it yourself.
WHY YOU SHOULD REGULARLY CHANGE MOTORCYCLE OIL
Engine protection - Over time, motorcycle oil breaks down and loses its lubricating properties. This results in increased friction, heat buildup, and potential engine wear. Clean oil ensures that the engine's components move smoothly, reducing the risk of damage and prolonging its lifespan.
Improved performance - Fresh motorcycle oil with the correct viscosity and additives ensures optimal engine performance, smoother acceleration, and a more responsive throttle.
Extended engine life - Regularly changing your motorcycle's oil can reduce wear on the engine's components, such as the pistons, bearings, and crankshaft. By keeping these parts well-lubricated and protected, you can extend the life of your engine and avoid costly repairs or premature engine failure.
Increase fuel efficiency - Dirty or old oil can cause the engine to work harder, leading to increased fuel consumption. Changing the oil ensures the engine operates efficiently, reducing friction and improving fuel combustion.
Heat dissipation - As oil circulates through the engine, it absorbs heat and carries it away, preventing overheating. Regularly changing the oil ensures the engine remains cool and operates within the optimal temperature range. Over time however, oil breaks down and loses its heat-dissipating properties.
Contaminant removal - Oil will start accumulating contaminants and will continue to accumulate internal combustion residue and metal particle contaminants from worn engine components if engine oil is not changed within its scheduled maintenance intervals. Additionally, operation in harsh environments, severe operating conditions, or prolonged neglect of maintenance intervals could allow sludge, dirt, or other contaminates to accumulate after a period. These contaminants can harm the engine, causing increased friction and potential damage. Regular oil changes remove these contaminants and ensure the engine remains clean and free from harmful debris.
Pro Tip: If you ride in extreme conditions (frequent intervals in cold weather, hot climates, off-road, or high-revving sportbike use) or severe operation conditions (such as heavy traffic), consider changing your oil more frequently than manufacturer recommendations.
SIGNS YOUR ENGINE NEEDS AN OIL CHANGE
Your motorcycle owner’s manual will tell you when to change the motorcycle oil. However, there are also signs that it may be time.
The Oil Looks Cloudy
When the oil has a cloudy appearance, this could be a sign of water intrusion caused by a gasket failure in the cooling system or a loose or worn oil cap exposed to water or flooding.
If this is the case, check with your dealer or service technician right away to investigate further.
The Oil Is Too Thin or Too Thick, Dark Or Black
As oil ages and becomes contaminated, it degrades viscosity and turns dark or black.
If you check your dipstick and notice that it appears thin, dark, or black, it's a clear sign that it's time for an oil change.
An Unfamiliar or Burnt Smell
For motorcycles without a separate transmission case, a burning smell could be an early indication of the clutch becoming worn and further service may be required beyond an oil change.
Decrease In Volume Of Engine Oil
An unexpected decrease in engine oil volume is a sign that it's being burned or lost via a potential leak. An oil change may be necessary to maintain the proper oil level and ensure optimal engine performance.
High Engine Temperature
Insufficient or degraded oil can significantly increase friction and cause excessive heat buildup in the engine.
If your engine temperature is consistently higher than usual, it could indicate that the oil needs to be changed.
Overheating could cause damage to engine components, so addressing the issue promptly is crucial.
Harsh Engine Sound
You may notice a harsher, louder engine sound when oil becomes old and loses effectiveness.
This could lead to increased friction and metal-to-metal contact within the engine.
REQUIRED SUPPLIES
Tool List
Funnel
Paper towels
Oil catch pan or container
Gloves (to protect your hands)
Oil filter removal tool (if necessary)
Oil filter strap wrench (if required)
Safety glasses (to protect your eyes)
Oil filter drain tray (optional but helpful)
Oil filter torque tool (if specified by the manufacturer)
Socket wrench or box wrench (appropriate size for your drain plug)
Torque wrench (to tighten the drain plug to the manufacturer's specifications)
Parts List
Engine oil (check your motorcycle's owner's manual for the recommended oil type and quantity)
Motorcycle oil filter (ensure it is compatible with your motorcycle's make and model)
Crush washer (if required for your drain plug)
Note: The specific tools and parts required for an oil change may vary depending on your motorcycle's make, model, and year. Always consult your motorcycle's owner’s manual and the factory service manual for your specific bike's recommended tools and parts.
DETERMINE THE TYPE OF MOTORCYCLE OIL YOU NEED
To determine the type of motorcycle oil you need, consider the following factors:
Oil Grade (Viscosity)
The recommended viscosity grade for your motorcycle can typically be found in the owner's manual or on the manufacturer's website.
The viscosity or thickness of the oil is indicated by a numerical value followed by the letter "W" (which stands for winter) on the oil bottle label.
Common viscosity grades for motorcycle oils include 10W-40, 15W-50, and 20W-50.
Motorcycle Oil Type
Motorcycle oils come in different formulations, including conventional, semi-synthetic, and synthetic.
Conventional motor oil – Basic mineral motor oil, budget friendly but breaks down faster.
Semi-synthetic motor oil – A mix of synthetic and mineral motor oil for a balance of affordability and performance.
Full synthetic motor oil – Offers better lubrication, heat resistance, and longevity.
Check your motorcycle's owner's manual or consult the manufacturer's recommendations to determine the appropriate oil for your bike type.
Common Industry Oil Standards
Motorcycle oils often adhere to industry standards set by organizations such as the American Petroleum Institute (API) and the Society of Automotive Engineers (SAE).
The API standards are denoted by a two-letter code, such as:
API SN
API SL
API SM
These indicate the level of performance and protection the oil provides. The SAE standards represent the oil's viscosity grade, as discussed earlier.
Look for these industry standards on the oil bottle label to ensure you choose a suitable oil for your motorcycle.
Pro Tip: Avoid switching lubricant brands indiscriminately because some lubricants interact chemically when mixed. The use of inferior lubricants can damage the engine.
HOW TO CHANGE MOTORCYCLE OIL
Step 1: Warm Up Your Engine
Start your motorcycle. Allow it to run for 2-3 minutes. Warm oil will flow more easily and helps flush out contaminants when draining.
Step 2: Oil Cap
Remove the oil cap on the engine to allow air to flow into the engine and facilitate the oil-draining process.
Step 3: Prepare the Work Area
Place an oil catch pan or container underneath the drain plug to catch the old oil. Lay down a protective mat or absorbent material to catch any spills.
Step 4: Drain Bolt Removal
Locate the drain bolt on the bottom of the engine oil pan. Loosen and remove the drain bolt carefully using the appropriate socket or box wrench. Warning: used oil will start flowing through drain immediately, avoid direct contact with hot engine oil.
Step 5: Drain Old Oil
Allow the used oil to completely drain from the engine by letting it flow into the catch pan. Ensure that all the used oil has been drained before proceeding.
Step 6: Remove The Old Filter
Locate the oil filter on your motorcycle, usually near a low point on the engine. Using an oil filter wrench or removal tool, carefully loosen and remove the old oil filter making sure the rubber gasket isn’t stuck to the engine. Be cautious, as more oil may drain from the filter.
Step 7: Install New Filter
Apply a thin layer of new oil to the new motorcycle oil filter's rubber gasket. Install the new oil filter by hand, ensuring it is tightened according to the manufacturer's specifications. Avoid overtightening, as this can damage the filter or cause leaks.
Step 8: Replace The Sealing Washer
If your drain bolt has a crush washer, remove the old washer and replace it with a new one. This helps ensure a proper seal when reinstalling the drain bolt.
Step 9: Install The Drain Plug
Carefully reinstall the drain bolt and tighten it securely, but do not overtighten it. Use a torque wrench, following the manufacturer's recommended torque specifications.
Step 10: Add New Oil
Use a funnel to add fresh oil to the engine through the oil fill port. Be careful to fill the right amount, which can lead to performance issues.
Step 11. Clean Any Residual Oil Off The Motorcycle
Using a clean rag or paper towel, wipe away any residual oil that may have spilled or accumulated on the engine or other surfaces during the oil change process. Be sure that no lubricants or fluids get on tires, wheels or brakes when changing fluid. Traction can be adversely affected. Here’s some tips on how to clean your bike after an oil change.
Step 12: Check Your Work
Double-check that the replacement oil filter and drain bolt are tightened securely. Inspect for any signs of oil leakage around the drain bolt and oil filter.
Once you're confident everything is in place, start the engine and let it idle for a few minutes to circulate the fresh oil throughout the engine.
Check the oil level using the dipstick or sight glass and add more oil if needed.
Pro Tip: Oil level indication on the dipstick may distinguish between checking the oil level when the engine is hot or cold or whether the motorcycle is upright or on the side stand. Be sure to check your owner’s manual for the proper procedure to check oil level.
Common Mistakes to Avoid
Overtightening the drain plug (can strip threads).
Forgetting to check the oil level after starting the engine.
Using car oil (can cause clutch slippage in wet-clutch motorcycles).
Over or under filling the engine for the specified amount of oil due to improper oil level check for engine oil temperature, or motorcycle position, or on an unlevel surface.
COMMONLY ASKED QUESTIONS ABOUT CHANGING OIL
How To Check The Motorcycle Engine Oil?
To check the motorcycle engine oil, ensure the bike is on level ground, and the engine is cool. Follow the oil level check procedure as outlined in the Owner’s Manual.
Depending on your motorcycle model, locate the dipstick or sight glass on the engine. Remove the dipstick or check the oil level through the sight glass.
Wipe the dipstick clean, reinsert it, and then remove it to check the oil level.
The oil level should be between the minimum and maximum marks on the dipstick. If equipped with an oil level sight glass on the engine, the oil level is generally between the designated range in the sight glass.
How Often Should I Change The Oil?
The first oil change for a new motorcycle may be within the first 1, 000 miles but generally oil changes are recommended every 3,000 to 6,000 miles or every six months, whichever comes first. However, it's best to consult your motorcycle's owner's manual for the manufacturer's specific recommendations for your bike.
The frequency of oil changes varies depending on the motorcycle's make, model, and manufacturer's recommendations. If you operate your motorcycle under adverse conditions (severe cold, extreme heat, very dusty environment, very bad roads, through standing water, etc.), you should perform the regular maintenance intervals more frequently to ensure the safe operation of your motorcycle
What Should I Do With The Used Oil?
Used oil should never be disposed of in regular household waste or poured down drains. It is harmful to the environment.
Instead, take the used oil to a recycling center or an automotive shop that accepts used oil. Many local recycling centers or auto parts stores have collection points for used oil that can be properly recycled.
Should I Use Synthetic Motor Oil Or Mineral Motor Oil?
Synthetic motor oil generally offers better performance, improved lubrication, and higher resistance to heat, making it suitable for high-performance or demanding applications.
Mineral motor oil is less expensive and can be suitable for normal riding conditions.
It's recommended to refer to your motorcycle's owner's manual for the manufacturer's recommended oil type.
How Do I Top Off Motorcycle Engine Oil?
To top off the motorcycle engine oil, locate the oil fill port, typically on top of the engine. Remove the oil cap and slowly add small amounts of oil using a funnel.
Check the oil level using the dipstick or sight glass to ensure it reaches the recommended range.
What Happens If You Skip Oil Changes?
Skipping an oil change interval can lead to a variety of problems. Over time, the oil becomes degraded and loses its lubricating properties, resulting in more friction and wear on engine parts.
This can result in reduced engine performance, decreased fuel efficiency, overheating, and potentially severe engine damage.
BOTTOM LINE ON CHANGING MOTORCYCLE OIL
Changing the oil in your motorcycle is a critical maintenance task that helps ensure optimal engine performance, longevity, and overall reliability.
Following the proper steps and guidelines for changing motorcycle oil, you can maintain a healthy engine and enjoy a smoother and more enjoyable riding experience.
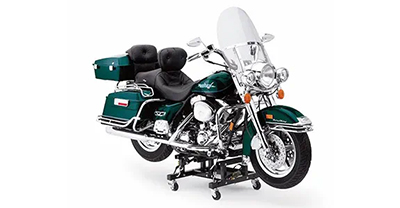
Unless you live in a region that experiences no winter, you will have to winterize your bike. Make it an easy process with these storage tips and tricks.
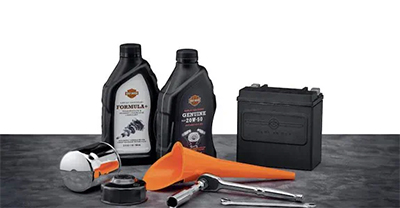
Follow this checklist of spring motorcycle maintenance tips to get your bike ready while waiting for the first nice day of the riding season. Learn more!
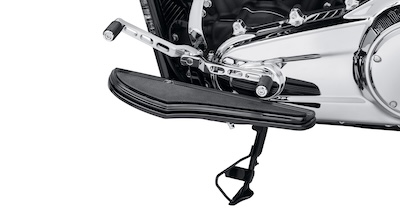
This step-by-step guide explains the mechanics and timing of gear shifting so you can ride your motorcycle with confidence and precision.

